Maintain Child Support Cases
Topics
* Overview
For Individual Users Only
* Edit/Delete Child Support Case
* When Adding an Existing Case
For Employer Users Only
o Add Individual Employee Case
o Load employee file from RAPID
o Upload from a Pre-defined File
* When Adding an Existing Employee Record
* Edit/Delete Child Support Case
Overview
Before you can schedule a case payment, you must first retrieve existing case information, add it to your iPayOnline account, and make any desired adjustments. Employer users add and manage child support cases through employee records. Individual users add and maintain the child support case of the non-custodial parent, also known as the obligor.
Since employer users maintain a greater number of cases, they have more functionality than an individual user for retrieving existing child support cases.
An individual user:
* May retrieve and add an obligor from the central child support database by entering the non-custodial parent's social security number along with a case or participant number.
An employer user:
1. May retrieve an employee from the central child support database by entering the employee's social security number along with the case or participant number.
2. May import employee records from prior payment history associated with the employer FEIN if it exists.
3. May upload employee records from a predefined text (.txt), Excel (.xls), or XML (.xml) file formats.
For Individual Users Only
Add Child Support Case
Before child support payments may be scheduled, the obligor's child support cases must be retrieved and added to the iPayOnline account. The obligor is the non-custodial parent with the order to pay child support. When searching for cases, all corresponding child support cases will be retrieved for that obligor. Each case retrieved will automatically be selected for adding unless it already exists within your iPayOnline account from a previous add. You must de-select those that you do not want to add to the iPayOnline account.
To Search for and Add a Valid Case:
The steps below assume the case you are adding does not already exist. To overwrite an existing case, refer to the When Adding an Existing Case section.
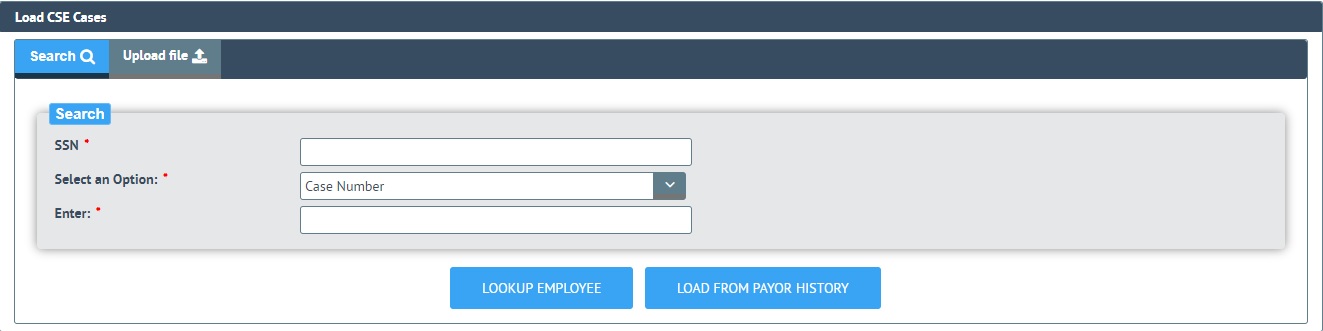
1. Select Maintain Child Support Cases from the iPayOnline main menu.
2.
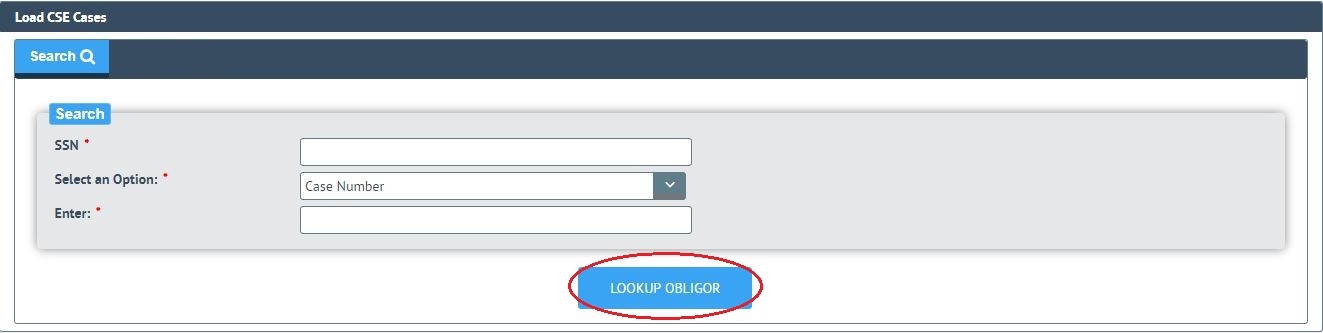
Click on ![]() shown in the initial screen for maintaining child support cases.
shown in the initial screen for maintaining child support cases.
3. Enter the obligor's social security number and the participant number or case number that is needed. Both entries are required. If more than one case exists for the obligor, entering any one of the participant/case numbers will retrieve all others and you will be able to select.
4.
Click ![]() A list of child support cases belonging to the obligor will display for
your review and selection.
A list of child support cases belonging to the obligor will display for
your review and selection.
5. Un-check any listed case that you do not want to add.
Note: If the case is not checked when it is first retrieved, it already exists in your iPayOnline account. Refer to the When Adding an Existing Case section.
6. Enter the Amount of child support that is due for each case you have selected to add. A case cannot be added with a zero amount.
Note: When payment is made and you are a participant in multiple cases, State and Federal requirements may modify the allocation of your payment among your cases from what you have specified.
7.
Click ![]() and a list displays with the added cases.
and a list displays with the added cases.
8. Repeat the process to add additional obligor cases, starting with step 2.
When Adding an Existing Case
When retrieving and adding a child support case that already exists within your iPayOnline account and the selected division, it will not be selected for adding when it is initially retrieved.
If you choose to select the case and add it, the case will overwrite the existing one. You must confirm the overwrite before proceeding.
To Overwrite an Existing Case:
Instead of overwriting an existing case, you can Change Child Support Case Information.
1. Select Maintain Child Support Cases from the iPayOnline main menu.
2.
Click on ![]() shown in the initial screen for maintaining child support cases.
shown in the initial screen for maintaining child support cases.
3. Enter the obligor's social security number and the participant or case number of the child support case.
4.
Click ![]() .
A list of child support cases belonging to the obligor will display for
your review and selection.
.
A list of child support cases belonging to the obligor will display for
your review and selection.
5. Check the existing case that you want to re-add. A message will display asking you to confirm the overwrite.
6.
Click ![]() to proceed with overwriting the existing case
or
to proceed with overwriting the existing case
or ![]() to abort the process.
to abort the process.
7. Enter the Amount of child support that is due for each case you have selected to add. A case cannot be added with a zero amount.
8.
Click ![]() to continue with the overwrite or cancel the proccess and close the Lookup
results window.
to continue with the overwrite or cancel the proccess and close the Lookup
results window.
9.
You may check the Medical Support Provided box
at this time, if applicable, or return to edit at a later time. If it was previously checked, it will be
unchecked during the overwrite. If
you check this field, you must click
For Employer Users Only
Add Child Support Case
Before child support payments may be scheduled, you must retrieve the employee records containing child support case information and add them to the iPayOnline account. Employee records may be retrieved by:
1. Retrieving an employee from the central child support database by entering the employee's social security number along with the case or participant number.
2. Importing employee records from prior payment history associated with the employer FEIN if it exists.
3. Uploading employee records from a predefined text (.txt), Excel (.xls), or XML (.xml) file formats.
By default, each case retrieved will automatically be selected for adding unless it already exists within your iPayOnline account. You must de-select those that you do not want to add to your iPayOnline account.
Three fields that are unique to employer users are:
* Division - employee records are able to be divided up into Divisions , which are maintained within iPayOnline. If you have more than one division, adding the employee records to the proper division is important since you will make changes to employee case information and schedule payments based on the selected division. An employee may exist in more than one division.
* Termination Date - the date that employment ended or will end for the employee. When you enter a termination date, all employee case records and Pending scheduled payments are removed on that date. This information is removed from all divisions that employee resides in. This notifies the agency the employee is not longer working with the employer. Payments that have already been submitted to the bank for payment will continue to be processed. When a termination date is entered, it must be within 30 days of the current date.
* Medical Insurance Avaliable - this checkbox is to be selected when the employer offers medical insurance to the employee as part of the employment compensation. By selecting the box, the employer is notifying the agency that if employee is ordered to provide medical coverage, that is avaliable through the employer.
The pages that display after employee case records are added will not include a Division column if only the default Main Division exists. The illustrations that follow are examples with multiple divisions defined.
To Search for and Add a Valid Case:
Tips before Starting
* Know the division of the employee and select it before adding.
* Know if the employee is ordered to provide medical support for the child(ren) and whether or not he/she is currently providing it.
1. Select Maintain Child Support Cases from the iPayOnline main menu.
2.
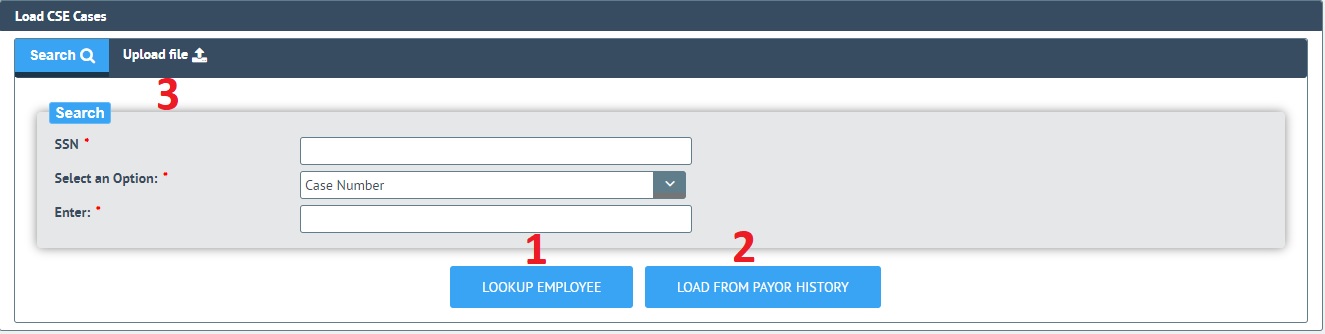
Click on ![]() shown in the initial screen for maintaining child support cases.
shown in the initial screen for maintaining child support cases.
3. Enter the employee's social security number and the participant or case number of the child support case. Both entries are required. If more than one case exists for the employee, entering any one of the participant/case numbers will retrieve all others.
4.
Click ![]() .
A list of child support cases belonging to the employee will display for
your review and selection.
.
A list of child support cases belonging to the employee will display for
your review and selection.
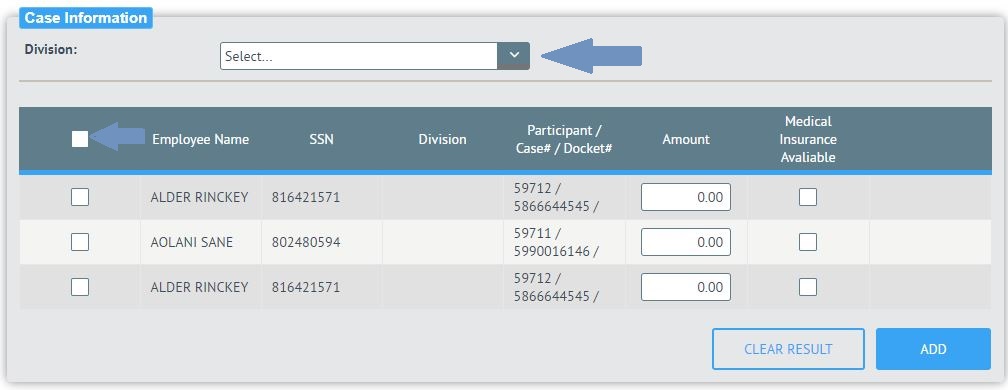
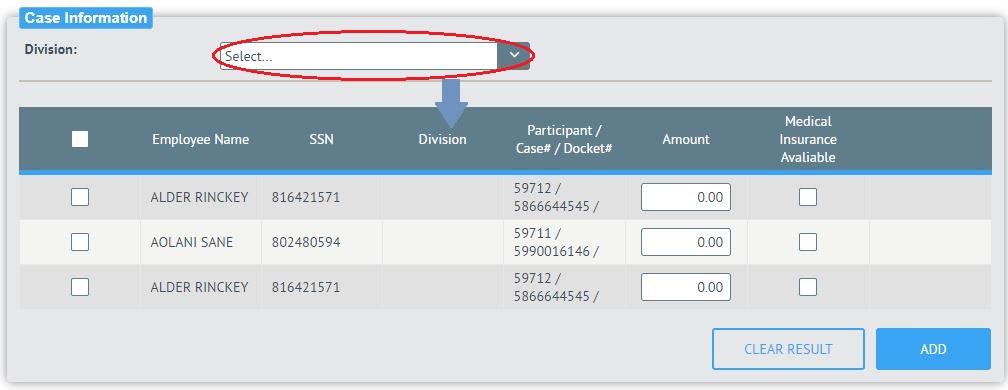
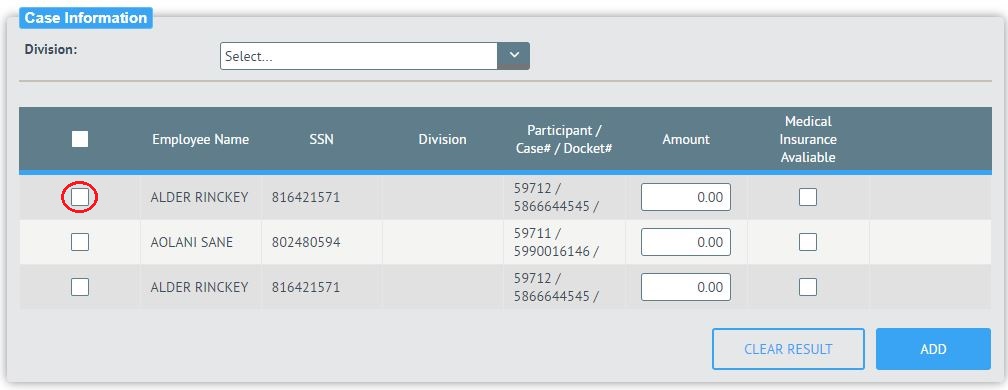
5. Choose the Division from the drop-down list. If a new Division is desired, refer to the Add a Division section.
Note: The Division column will be blank for the employee case record unless this case already exists as an iPayOnline case in the selected division or in another division.
6. Un-check any listed case that you do not want to add.
Note: If the case is not checked when it is first retrieved, it already exists in your iPayOnline account. The division(s) the existing case belongs to is listed in the Division column. Refer to the When Adding an Existing Employee Record section.
7. Enter the Amount of child support that is due for each employee case record you have selected to add. A case cannot be added with a zero amount.
Note: If you are withholding payments for an employee who is a participant in multiple cases, State and Federal requirements may modify the allocation of the payment among the employee's cases.
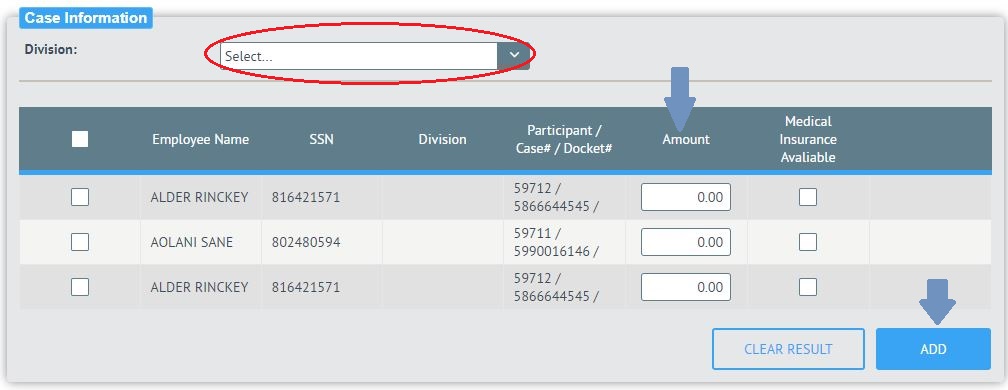
8.
Click ![]() and a list will display with the added case(s).
and a list will display with the added case(s).
Note: If you only have one division defined, a division column will not display in the Cases List.
9. If you have more than one division, it is recommended to verify the division for the employee and change it, if applicable. This is done by selecting a division from the drop-down list. This can also be done at a later time.
10. You may make entries in the following fields at this time, if applicable, or you may return to edit at a later time.
* Medical Insurance Avaliable - check this box if the employee has medical insurance avaliable to them and child(ren).
* Termination Date - enter the date employment will end in MM/DD/CCYY format. The date must be within 30 days of the current date. The employee's case records and Pending scheduled payments will be removed from all divisions on this date.
11. Repeat the process to add additional cases, starting with step 2.
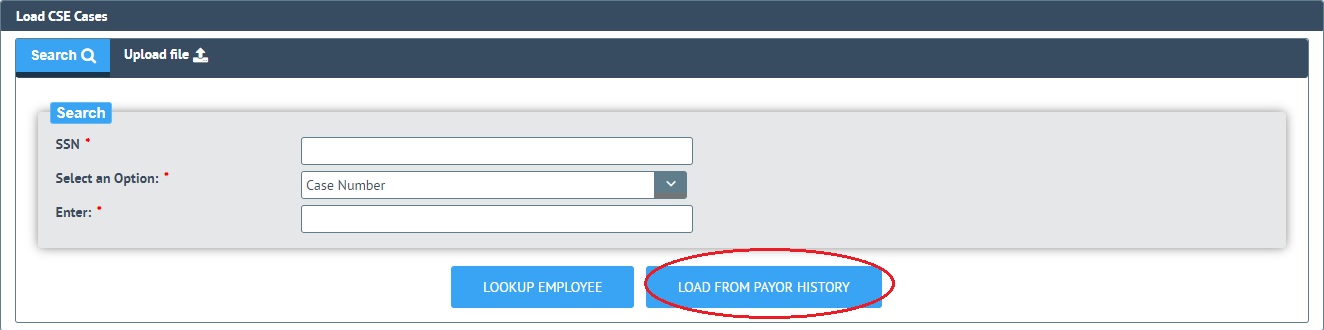
To Load a File from Payor Payment History:
When an employee file is loaded into iPayOnline from history, the employee records are first listed in the currently selected division for the opportunity to review and add only the desired records. Once the records are added to the currently selected division, the division may be changed for each employee individually if more than one division exists.
Records in the loaded file that already exist within one or more divisions will be differentiated in the retrieved list by listing the divisions they are classified with. In addition, records that already exist in your iPayOnline account will not be automatically selected for adding. Refer to the When Adding an Existing Employee Record section.
Tips before Starting
* Select the division with the largest number of employees so less division changes will be required after adding the retrieved records.
* Know the division that each employee should belong to and change to this division as soon as the records are added to the Cases List.
* Know the child support amount that is due for each employee case record.
* Know if each employee has medical insurance for them and their chil(dren) as part of their compensation package.
1. Select Maintain Child Support Cases from the iPayOnline main menu.
2.
Click on ![]() shown in the initial screen for maintaining child support cases.
shown in the initial screen for maintaining child support cases.
3.
Click ![]() .
A list of employee records will be loaded for review and selection for
adding into the iPayOnline account.
.
A list of employee records will be loaded for review and selection for
adding into the iPayOnline account.
4. Choose the division from the drop-down list. If a new division is required, refer to the Add a Division section.
Note: The Division column will be blank for the employee case record unless this case already exists as an iPayOnline case in the selected division or in another division.
Note: Each record, or all at once, must be selected for adding into iPayOnline when initially loaded. If the case is not checked when it is first retrieved, the divisions the existing case belong to are listed in the Division column. Refer to the When Adding an Existing Employee Record section.
5. De-select the desired employee records.
Tip:
Clicking the box next to the Employee Name heading will toggle between selecting and deselecting ALL cases.

6. It is recommended to change the employee's division at this time, if applicable. This is done by selecting one from the drop-down list. It can also be done at a later time.
7.
You may make entries in the following fields at
this time if applicable, or you may return to edit at a later time.
If you make any changes to the added data, you must click
* Amount- this should be the amount due for child support for each employee case record. The amount that is retrieved and loaded from RAPID is the amount that was applied to the child support payment at the time it was processed in RAPID. This amount may not be what is actually due.
* Medical Insurance Avaliable - check this box if the employee has medical insurance avaliable to them and child(ren).
* Termination Date - enter the date employment will end in MM/DD/CCYY format. The date must be within 30 days of the current date. The employee's case records and Pending scheduled payments will be removed from all divisions on this date.
8.
Click ![]() . The
selected employee records will be added to the Cases List.
. The
selected employee records will be added to the Cases List.
To Upload from a Pre-defined File:
When a pre-defined employee payment file is uploaded into iPayOnline, the employee case is first validated as an existing case. All cases within the file are validated and if a case is listed that is not found in the central child support database, it will be reported after the upload is completed.
All valid cases are first listed in the currently selected division for the opportunity to review and to select only the desired cases for adding. Once the records are added to the currently selected division, the division may be changed for each employee.
Records in the loaded file that already exist within one or more divisions will be differentiated in the retrieved list by listing the divisions they are classified with. In addition, records that already exist in your iPayOnline account will not be automatically selected for adding.
Tips before Starting
* Select the division with the largest number of employees so less division changes will be required after adding the retrieved records.
* Know the division that each employee should belong to and change to this division as soon as the records are added to the Cases List.
* Know the child support amount that is due for each employee case record.
* Know if each employee is ordered to provide medical support for their child(ren) and whether or not he/she is currently providing it.
1. Select Maintain Child Support Cases from the iPayOnline main menu.
2.
Click on ![]() shown in the initial screen for maintaining child support cases.
shown in the initial screen for maintaining child support cases.
3.
Click on ![]() tab.
tab.
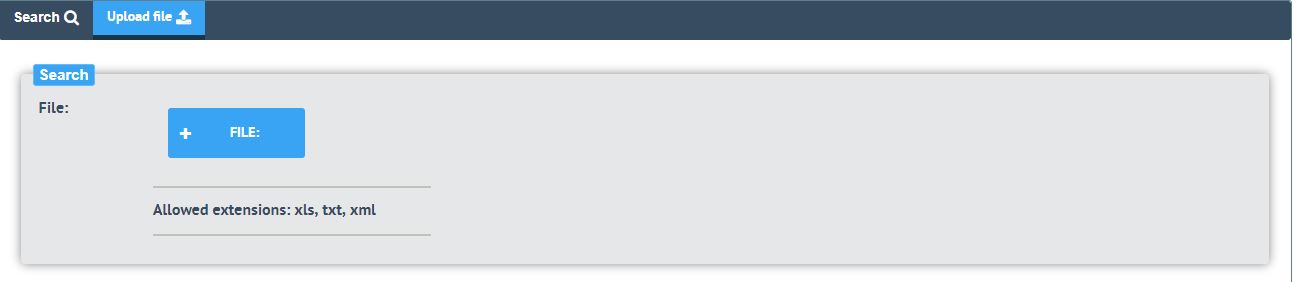
4.
Click on ![]() and navigate to the file, select it, and click
and navigate to the file, select it, and click ![]()
5. A list of employee case records is loaded for review and selection for adding into your iPayOnline account. Case records failing validation along with the reason for rejection are listed above the valid cases.

Note: A record is automatically selected for adding into iPayOnline when initially loaded if it is not already a member of one or more divisions. If the case is not checked when it is first retrieved, the divisions the existing case belong to are listed in the Division column. Refer to the When Adding an Existing Employee Record section.
7. De-select the desired employee case records.
Tip:
* Clicking the box next to the Employee Name heading will toggle between selecting and deselecting ALL cases.

8. It is recommended to change the employee's division at this time, if applicable. This is done by selecting one from the drop-down list. It can also be done at a later time.
9. You may make entries in the following fields at this time if applicable, or you may return to edit at a later time.
* Amount - this should be the amount due for child support for each employee case record. The amount that is retrieved and loaded from the pre-defined file may or may not be what is actually due and should be confirmed.
* Medical Support Provided - check this box if the employee has a court order to provide medical coverage for his/her child(ren) and are providing it.
* Termination Date - enter the date employment ended or will end in MM/DD/CCYY format. The date must be within 30 days of the current date. The employee's case records and Pending scheduled payments will be removed from all divisions on this date.
10.
Click ![]() . The
selected employee records are added to the Cases List.
. The
selected employee records are added to the Cases List.

When Adding an Existing Employee Record
When retrieving and adding an employee record, a case that already exists within your iPayOnline account will not be selected for adding when it is initially retrieved regardless of the method of case retrieval used.
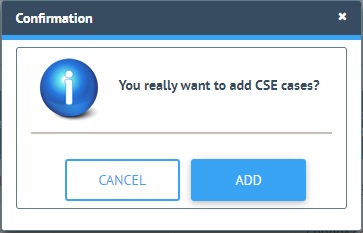
If you choose to select the case and add it to the currently selected division, the case will overwrite any matching case in that division. If the case exits in another division but not in the currently selected one, it will be added to the currently selected division. This results in the same employee case belonging to two different divisions. You must confirm that this is what you want to do by responding to the following message when you click the box to select the case:
To Overwrite or Add to Another Division:
Instead of overwriting an existing case, you can Change Child Support Case Information.
1. Select Maintain Child Support Cases from the iPayOnline main menu.
2.
Click on ![]() shown in the initial screen for maintaining child support cases.
shown in the initial screen for maintaining child support cases.
3. Retrieve the employee case records using one of the three retrieval methods. Refer to the Add Child Support Case section for an overview.
4. Check the existing case that you want to overwrite in the selected division or add to another division. A message will display asking you to confirm the action.
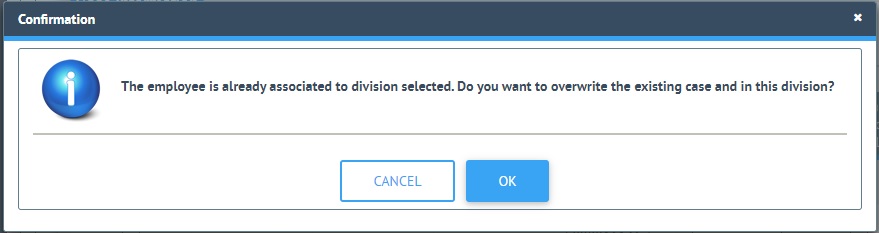
5.
Click ![]() to proceed with adding the case to another
division or overwriting the existing case in the selected division. Click
to proceed with adding the case to another
division or overwriting the existing case in the selected division. Click ![]() to abort the process followed by
to abort the process followed by
![]() to close the Lookup results window.
to close the Lookup results window.
6. Depending on the retrieval method used, you may be required to enter the Amount of child support that is due for each case you have selected. A case cannot be added with a zero amount.
7. You may make entries at this time to specific fields, or you may return to edit at a later time. Refer to the appropriate case retrieval method for the fields that are available for editing.
8.
Click ![]() to continue with the overwrite/add or
to continue with the overwrite/add or
![]() to cancel the process and close the Lookup results window.
to cancel the process and close the Lookup results window.
Divisions Overview
Divisions are organizational units that provide a way of classifying employees to manage child support case maintenance and payment as a group instead of individually. All employee case maintenance and the scheduling of payments are done through the division in which the employee resides. For example, if you have a division named Admin and you schedule recurring payments for this division, child support payments for all employee case records within the Admin division will be made using this schedule unless you specifically specify otherwise.
Divisions usually represent units that model the structure of a company in organizational or geographical terms. Divisions can be created to differentiate one group from another such as by department, region, payroll structure, job functions, etc.
A Main Division is automatically created for an employer user and cannot be removed. If you do not add your own divisions, all employee case records are added to the Main Division. It is recommended that you define additional divisions that meet your needs in order to customize and streamline case maintenance and payments.
Add a Division
To Add a Division:
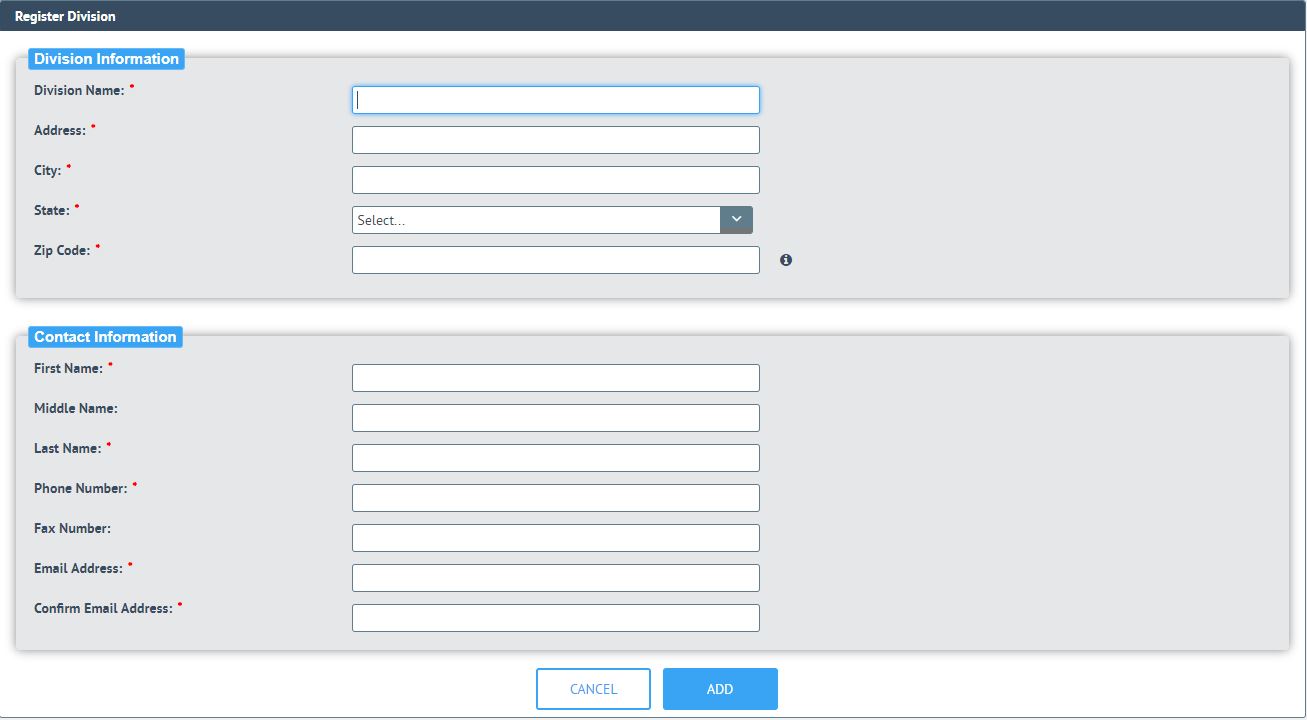
1. Select Register Division from the iPayOnline main menu.

2. Enter the Division and Contact information, selecting the State from the drop-down list. Make sure all required fields * have an entry.
3.
Click ![]() to add the new division, a message will display asking you to confirm the action.
to add the new division, a message will display asking you to confirm the action.
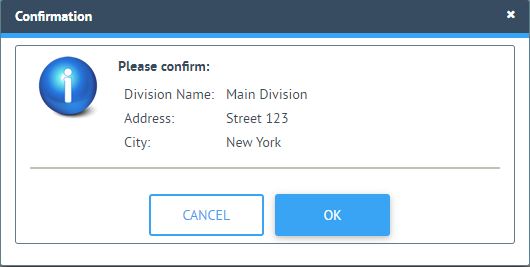
4.
Click ![]() to add the new division or
to add the new division or ![]() to abort the process.
to abort the process.
Edit/Delete a Division
Once a division is added, its information may be changed or the entire division deleted from the iPayOnline account at any time, other than the Main Division.
To Edit a Division:
1. Select Division from the iPayOnline main menu.
2. Click on the division to edit.

3. The screen will appear like the one in which the division information was originally entered.
4. Click in the area you would like to update and overwrite any existing information with the desired changes.
5.
Click ![]() to edit the division, a message will display asking you to confirm the action.
to edit the division, a message will display asking you to confirm the action.
4.
Click ![]() to edit the division or
to edit the division or ![]() to abort the process.
to abort the process.
To Delete a Division:
1. Select Division from the iPayOnline main menu.
2.
Click on the ![]() of the division to delete.
of the division to delete.

3.
Click ![]() in response to the following confirmation
prompt.
in response to the following confirmation
prompt.

5.
If you decide not to delete the division, click ![]() .
.
For Individual and Employer Users
Edit/Delete Child Support Case
Once a child support case is added, its information may be changed or the entire case deleted from your iPayOnline account at any time.
The following fields may be changed:
* Child Support Payment amount
* Medical Support Provided indicator
* Termination Date - Employer user only
The process for editing and deleting case information is the same for individual and employer users with the exception of specifying the division for employer users.
To Change Child Support Case Information:
1. Select Maintain Child Support Cases from the iPayOnline main menu to display a list of all cases.
2. Click on the employee name of the row that corresponds to the employee that you want to edit.
3. Click in the desired field and overwrite any existing information with the changes.
4. You may make changes to the following fields:
* Division - for employer users only - select a different division for the employee case from the division drop-down list.
* Termination Date - for employer users only - enter the date employment ended or will end in MM/DD/CCYY format. The date must be within 30 days of the current date. The employee's case records and Pending scheduled payments will be removed from all divisions on this date.
* Amount - enter the amount due for the child support payment. Changing the amount will automatically adjust any Pending scheduled payments to this amount.
* Medical Support Provided - check this box if there is a court order for the non-custodial parent to provide medical coverage for the child(ren) and he/she is providing it.
5.
Click ![]() ,
a message will display asking you to confirm the action.
,
a message will display asking you to confirm the action.
Note: Selecting a different iPayOnline option without saving will abort the edits and return the case fields to their previous values.
6.
Click ![]() to confirm the changes or
to confirm the changes or ![]() to abort the process.
to abort the process.
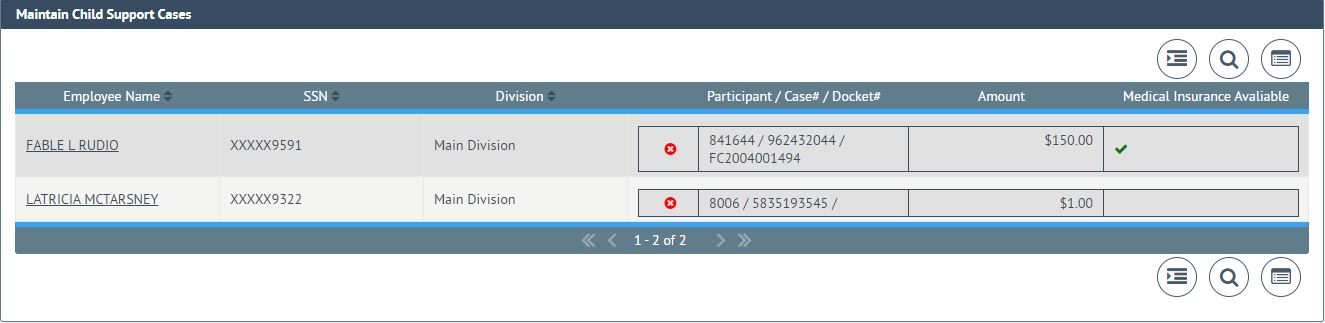
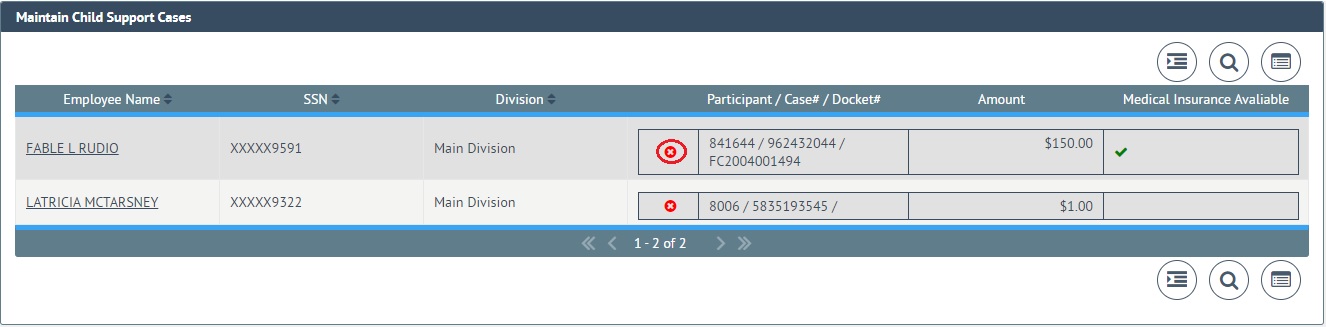
To Delete a Child Support Case:
The process for deleting case information is the same for individual and employer users except for the additional step of specifying the division for employer users. The illustrations below represent examples for employer users.
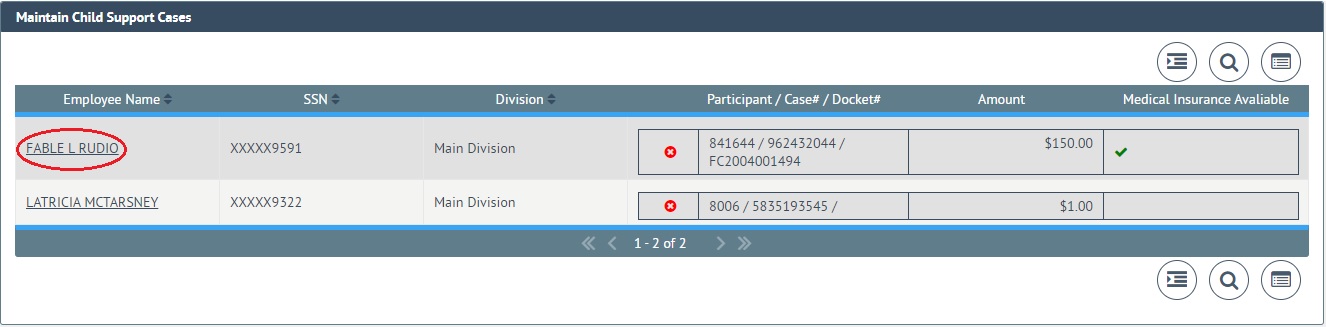
1. Select Maintain Child Support Cases from the iPayOnline main menu to display a list of all cases.
2.
Click
the ![]() at the end of the case row you would like to
delete.
at the end of the case row you would like to
delete.
Note: Deleting a case from the selected division will NOT delete it from other divisions it may reside in.
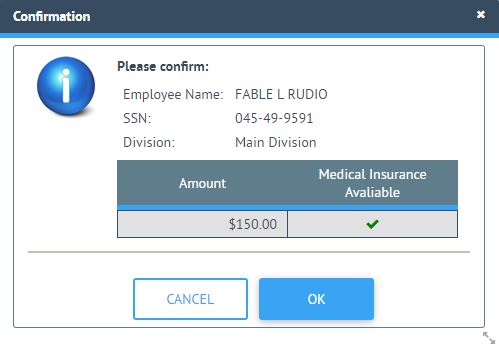
3.
Click ![]() in response to the following confirmation
prompt.
in response to the following confirmation
prompt.
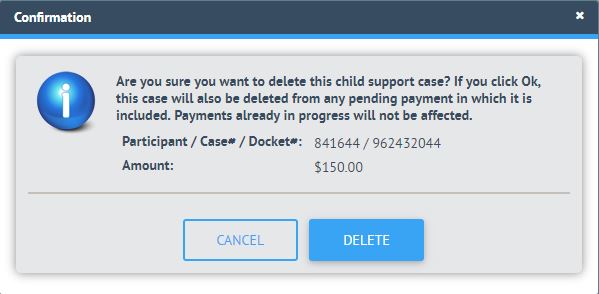
If you decide not to delete the case, click ![]() .
.