Schedule Payments
Topics
* Overview
* Schedule a payment with a Credit/Debit card
* Schedule a one Time Payment from a registered account
* Schedule a Recurring Payment from a registered account
o View/Change Pending Payments
Overview
* Account - bank account the payment amount will be drawn from.
* Withdraw Date or Schedule Designation - specifies the date and frequency of the payments. The information that you must specify is dependent upon the type of payment requested. Payment dates must be at least three days from the current date.
* Notify Me Before Paid - if checked, an email will be sent reminding you of the scheduled payment.
* Notify Me Before Payment - specifies how many days before the payment is made the email reminder is to be sent out. If the Notify Me Before Paid field is not checked, this field is ignored.
* Notify Me After Paid - if checked, an email will be sent confirming that the payment was made.
* Division - for employer users only - organizational unit that contains the list of employees and their child support amounts, as set up in the Maintain Child Support Case section. All payments are scheduled through divisions. The only employee case records that are available at the time payment schedules are created are those belonging to the selected division. Payments cannot be scheduled for employees across multiple divisions.
Credit/Debit Card payment
One Time Payment
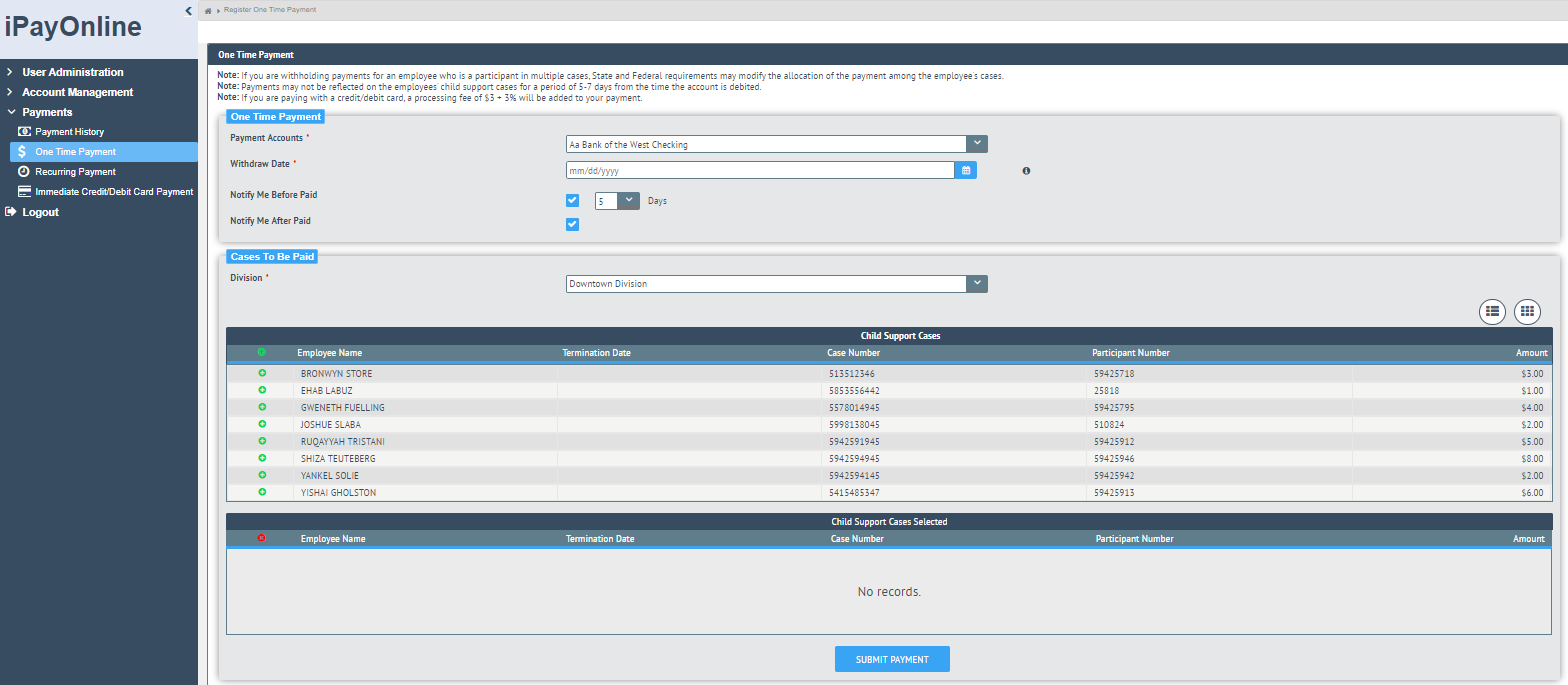
To Schedule a One Time Payment:
1. Select Maintenance Management from the iPayOnline main menu.
2. Select Register One Time Payment from the Maintenance Management menu.
3. Select the payment account from the drop-down menu.
4. Enter the date the payment is to be made in the Withdraw Date field.
5. Click the Notify Me Before Paid option to check or un-check depending on whether or not you would like to receive a reminder email.
6. If the Notify Me Before Paid option is checked, choose the number of days before the scheduled date from the Notify Me Before Payment drop-down list.
7. Click the Notify Me After Paid option to check or un-check depending on whether or not you would like to receive a confirmation of payment email.
8. For employer users only, select the division from the Division drop-down list. The list of employees will display based on the division selected.
9.
Select the Cases to be Paid by clicking the add icon
![]() on
the left-most box next to the employee's/obligor's name.
on
the left-most box next to the employee's/obligor's name.
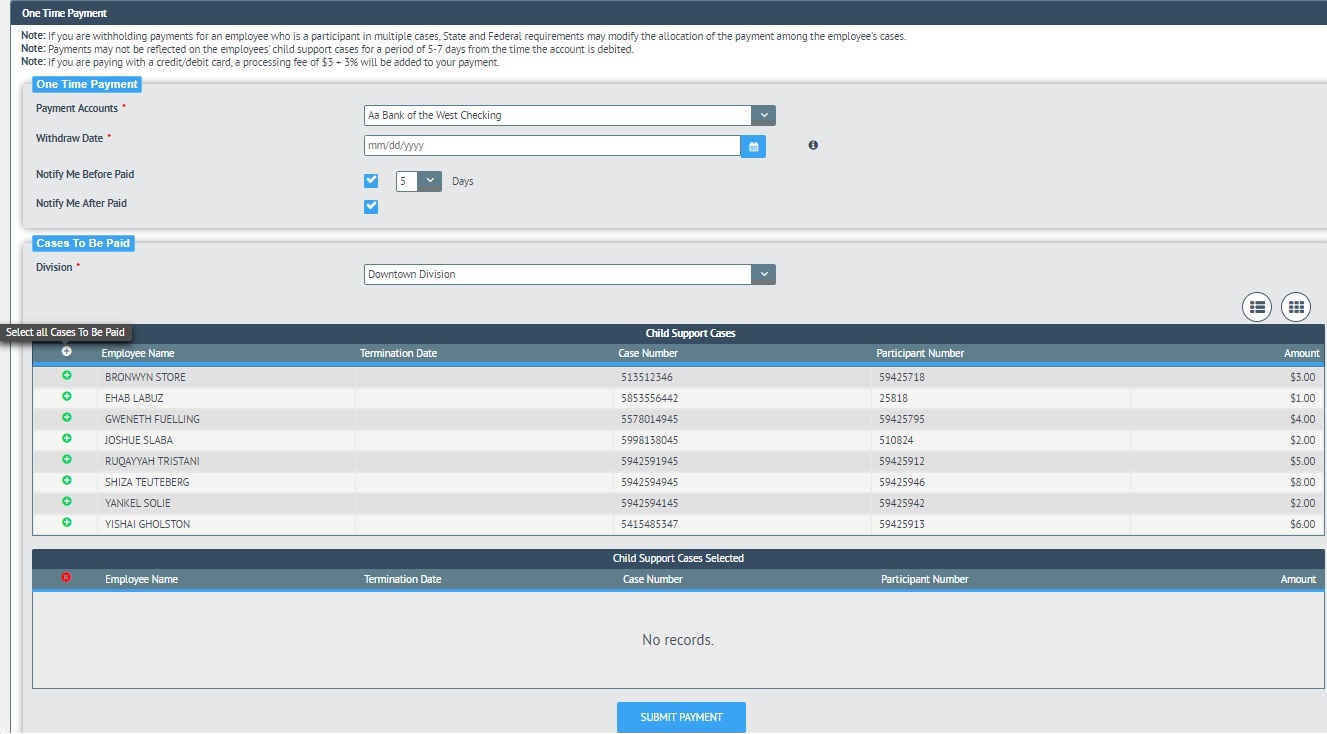
Tip:
* Clicking
the add ![]() or remove
or remove ![]() icons
next to the Employee (or Obligor) Name heading will
toggle between selecting and deselecting ALL employees.
icons
next to the Employee (or Obligor) Name heading will
toggle between selecting and deselecting ALL employees.
10. To schedule the payment, click Save.
11. A confirmation dialog displays the payment information. Click Ok to save the payment or Cancel to cancel the payment request.
12. When payments are successfully scheduled, the Pending Payments page will automatically display the payments listing table.
Recurring Payment
* Bi-weekly - two payments a month will be made with the first being made on the specified Start Date and the second payment being made two weeks after that date.
* Monthly - one payment will be made per month on the specified Day of the Month.
* Semi-monthly - two payments a month will be made, each on one of the two Days of the Month specified.
Note: The information required for you to enter will change based on the frequency selected. The example below illustrates the required fields for payments scheduled monthly.
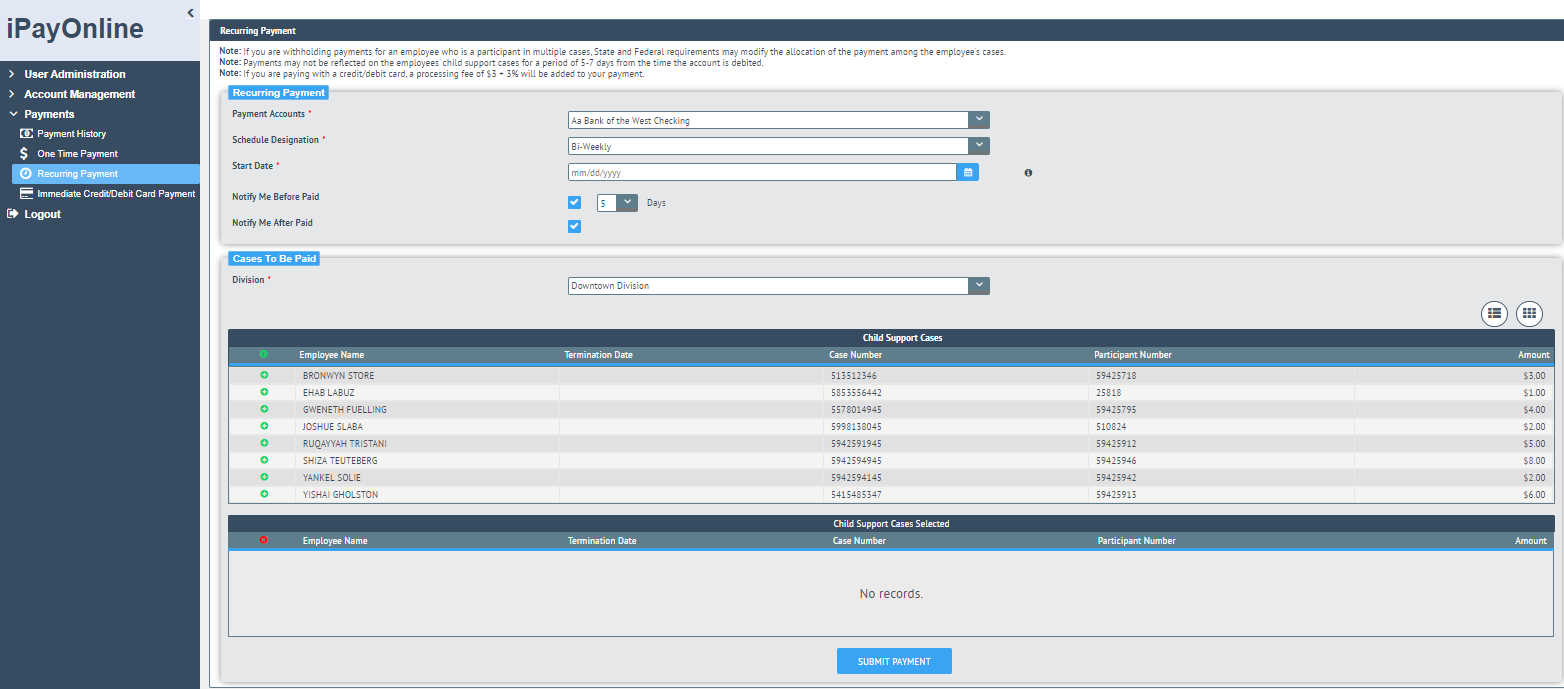
To Schedule a Recurring Payment:
1. Select Maintenance Management from the iPayOnline main menu.
2. Select Register Recurring Payment from the Schedule Payments menu.
3. Select the payment account from the drop-down menu.
4. Select the Schedule Designation from the drop-down list.
5. Specify the required date information depending on the Schedule Designation selected:
a. Bi-Weekly - enter the Start Date.

b. Monthly - enter Day of the Month.

c. Semi-Monthly - enter the first and second Day of the Month. Both days are required.

Note: Changing the Schedule Designation after selecting the Cases to be paid will reset the CASES list to the default of all selected.
6. Click the Notify Me Before Paid option to check or un-check depending on whether or not you would like to receive a reminder email.
7. If the Notify Me Before Paid option is checked, choosethe number of days before the scheduled date from the Notify Me Before Payment drop-downlist.
8. Click the Notify Me After Paid option to check or un-check depending on whether or not you would like to receive a confirmation of payment email.
9. For employer users only, select the division from the Select Division drop-downlist. The list of employees will display based on the division selected.
10.
Select the Cases to be Paid by clicking on
the add ![]() icon next to the employee's/obligor's name.
icon next to the employee's/obligor's name.
Tip:
*
Clicking the add ![]() and remove
and remove ![]() icons next to the Employee (or
Obligor) Nameheading will toggle between selecting and deselecting ALL cases.
icons next to the Employee (or
Obligor) Nameheading will toggle between selecting and deselecting ALL cases.

11. To schedule the payment, click Save.
12. A confirmation dialog displays the payment information. Click Ok to save the payment or Cancel to cancel the payment request.
13. When payments are successfully scheduled, the PendingPayments page will automatically display.
Pending Payments
* DateRequested - the date you scheduled the payment(s).
* Amount - the total payment amount of all cases scheduled within the Tracking ID.
* SettlementDate - the date the payment is to be withdrawn from the designated bank account for all case payments within this Tracking ID.
* PaymentAccount - the designated bank account that will be used for all case payments within this Tracking ID.
* PaymentType - the type of payment that the case was scheduled as.
* ID - the Tracking ID assigned to all case payments scheduled together.
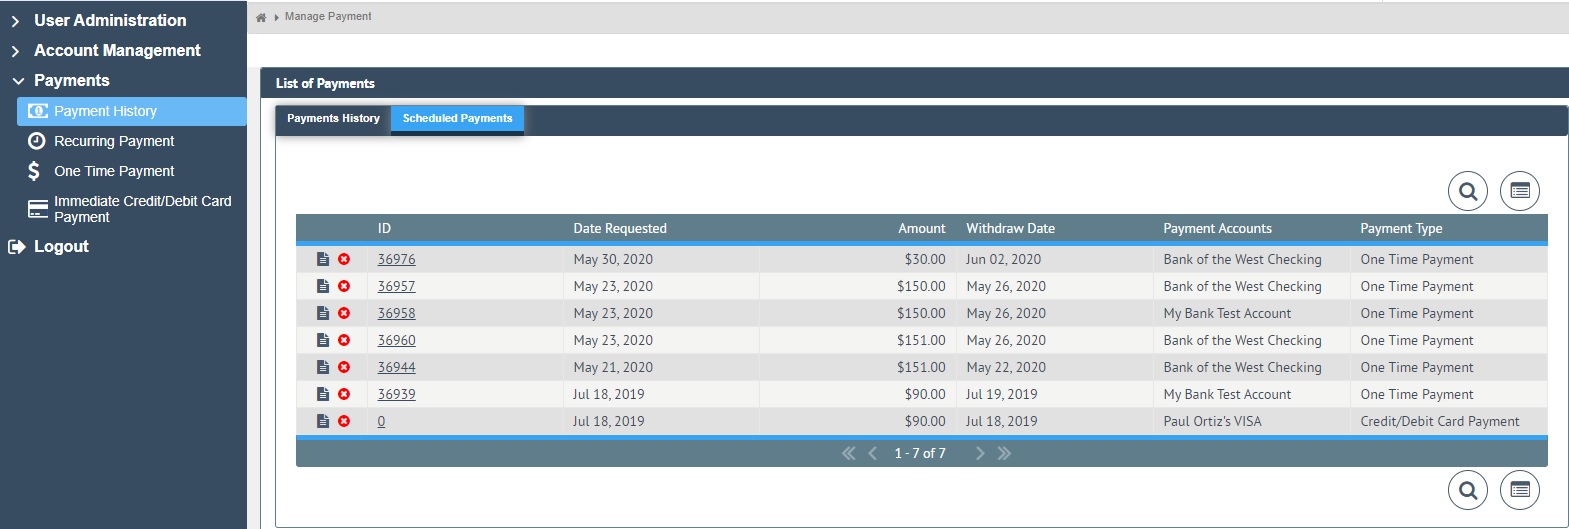
To View/Change Pending Payments:
1. Select Maintenance Management from the iPayOnline main menu.
2. Select Payments on the Schedule Payments menu. The payments listing table will be displayed on the Scheduled Payments tab
3. Click the Tracking ID that corresponds to the payment you wish to view/change under the ID heading.
4. The Schedule Payments page with all the data as scheduled will display. You may make the same changes as when originally scheduled, including selecting additional cases or removing currently scheduled ones. Refer to scheduling a one time payment or scheduling a recurring payment.
5. To save the payment changes, click Save.
6. A confirmation dialog displays the new payment information. Click Ok to apply the changes to the payment or Cancel to cancel the payment edition.
To Cancel Pending Payments:
Tip:
* Open and view the Tracking ID before deleting to ensure you are removing the desired scheduled payment(s).
1. Select Maintenance Management from the iPayOnline main menu.
2. Select Payments on the Schedule Payments menu. The payments listing table will be displayed on the Scheduled Payments tab
3.
Click on the Delete ![]() icon next to the Tracking ID of the payment that you want to remove.
icon next to the Tracking ID of the payment that you want to remove.
4. Click OK in response to the confirmation prompt or Cancel if you decide not to un-schedule the payment(s) within the Tracking ID.
Payment History
* TrackingNumber - a unique number assigned to the case payments that were paid using the same schedule criteria.
* DateRequested - the date you scheduled the payment(s).
* Amount - the total amount paid for all cases scheduled within the Tracking Number.
* SettlementDate - the date the amount was withdrawn from the designated bank account.
* PaymentAccount - the bank account that the amount was withdrawn from for this Tracking Number.
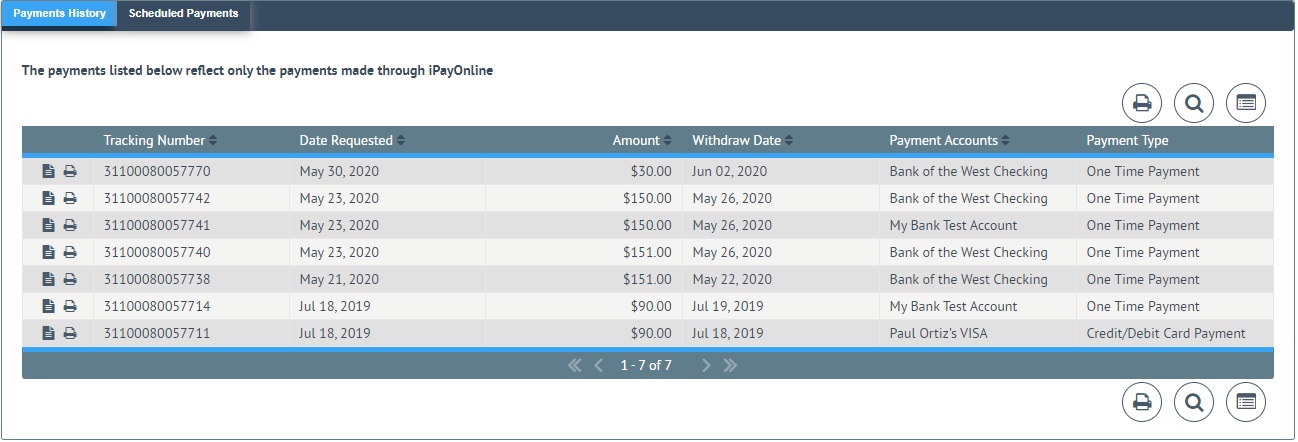
To View and Print Payment History:
Printing is accomplished by using the Printer Friendly Format option. The view currently displaying is the one that will print.
1. Select Maintenance Management from the iPayOnline main menu.
2. Select Payment from the Maintenance Management menu and enter to the Payment History tab.
3.
To print a summary list of all Tracking
Numbers,click on the PrinterFriendly Format icon ![]() on the top of the listing table.
Close the print window when done.
on the top of the listing table.
Close the print window when done.
4.
Click on the details ![]() icon on the row that corresponds to the
payment history you wish to view.
icon on the row that corresponds to the
payment history you wish to view.
5.
To print a detailed list of the paid
cases within this Tracking Number, click on the Printer Friendly Format icon
![]() on the row that
corresponds to the payment history you wish to print. Close the print window when done.
on the row that
corresponds to the payment history you wish to print. Close the print window when done.
To Sort Payment History
1. Select the Payment History tab from the payments listing table.
2. Move the mouse over the column heading you wish to sort by until you see the mouse pointer change and the sort tooltip appearing next to the cursor as illustrated below.
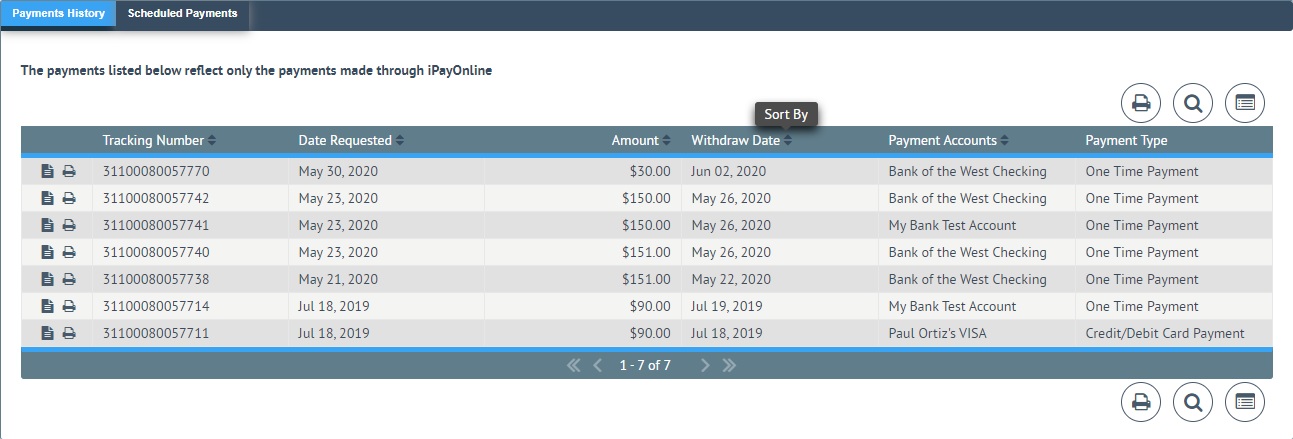
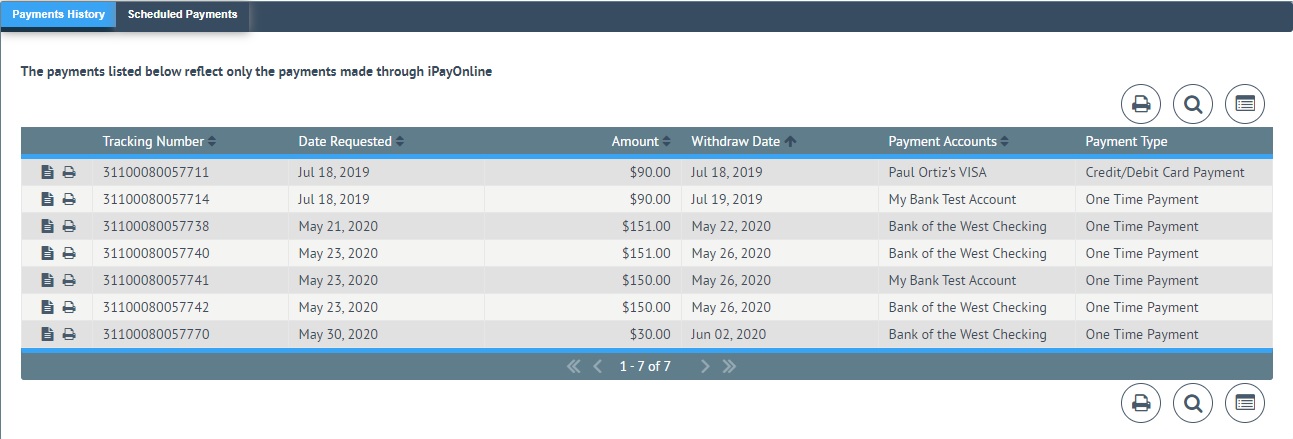
3.
Click the sorting ![]() icon. The first time you click on it, the data in that column is sorted in ascending order.
icon. The first time you click on it, the data in that column is sorted in ascending order.
The arrow pointing up next to the column lets you know at a glance what column the history is sorted on and whether the order is ascending or descending.
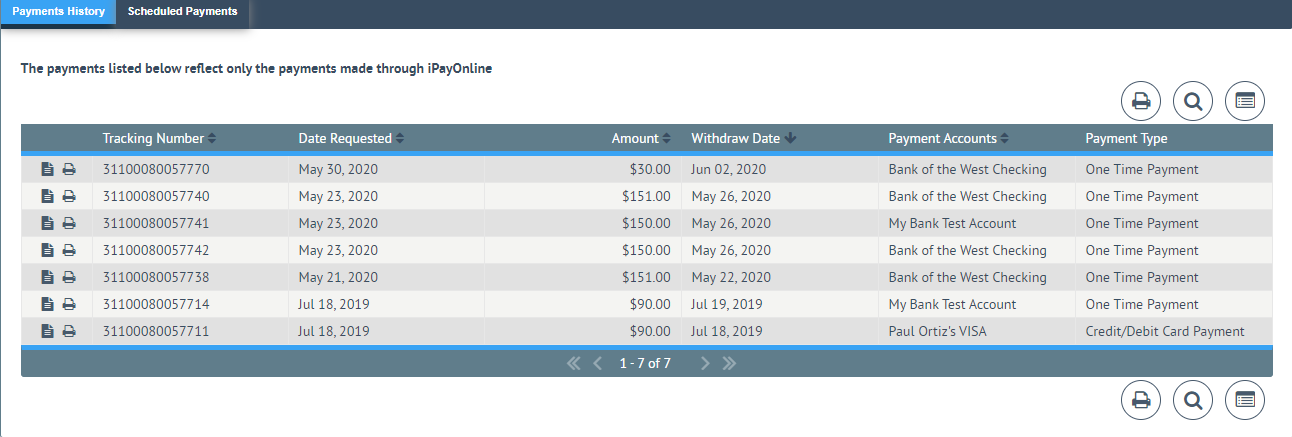
4.
Click the sorting ![]() icon a second time to change the history records into a descending order by that column. Note the
arrow pointing downward next to the column heading being sorted.
icon a second time to change the history records into a descending order by that column. Note the
arrow pointing downward next to the column heading being sorted.
Note: If you see no arrow next to any column heading, the default sort order by tracking number is in effect.
Note: If you move off the Payment History page, the sort order will default back to the tracking number.